How to Garden with One Hand (UK Setup & Tools Guide)
Not every one-handed gardener is starting from the same place, and that difference matters more than most guides admit. Someone six weeks post-stroke is often still rebuilding strength and confidence, and may only need this system for a season or two. Someone with a permanent limb difference or long-term nerve damage is kitting out for the long haul, and it’s worth spending more on tools that will still be earning their keep in five years. Lump the two together and you end up recommending either too little or too much.
What doesn’t change between those situations is the mechanics: a standard tool assumes a second hand is free to brace the stem, hold the pot, or steady the wheelbarrow, and one-handed gardening is really just the business of replacing that missing hand with layout, leverage, or a smarter tool. This guide runs through it as a practical four‑step system—Setup, Tools, Technique, and Maintenance—so you can work out which parts apply to your situation and skip the rest.
1. The “Setup” Phase: How Do You Arrange a Garden for One-Handed Work?
Picture the layout that causes the most one-handed frustration: a bag of compost on the ground, a trowel in the shed, and nothing within reach that doesn’t need two hands to move. Fix that picture and most of the daily strain disappears. The setup principle is simple — bring the soil up to waist height and put anything heavy on wheels, so you’re not fighting gravity every time you want to plant something.
📺 Watch: Accessible garden ideas - how to make a garden everyone can enjoy — The Middle-Sized Garden
The biggest time‑saver isn’t a new gadget; it’s the way your space is laid out. I always say I’m a gardener, not an occupational therapist, so for condition-specific adaptations it is always worth looking at guidance from Thrive, the UK charity that specialises in gardening for health. But from a purely practical standpoint, these are the mechanical changes that make the biggest difference:
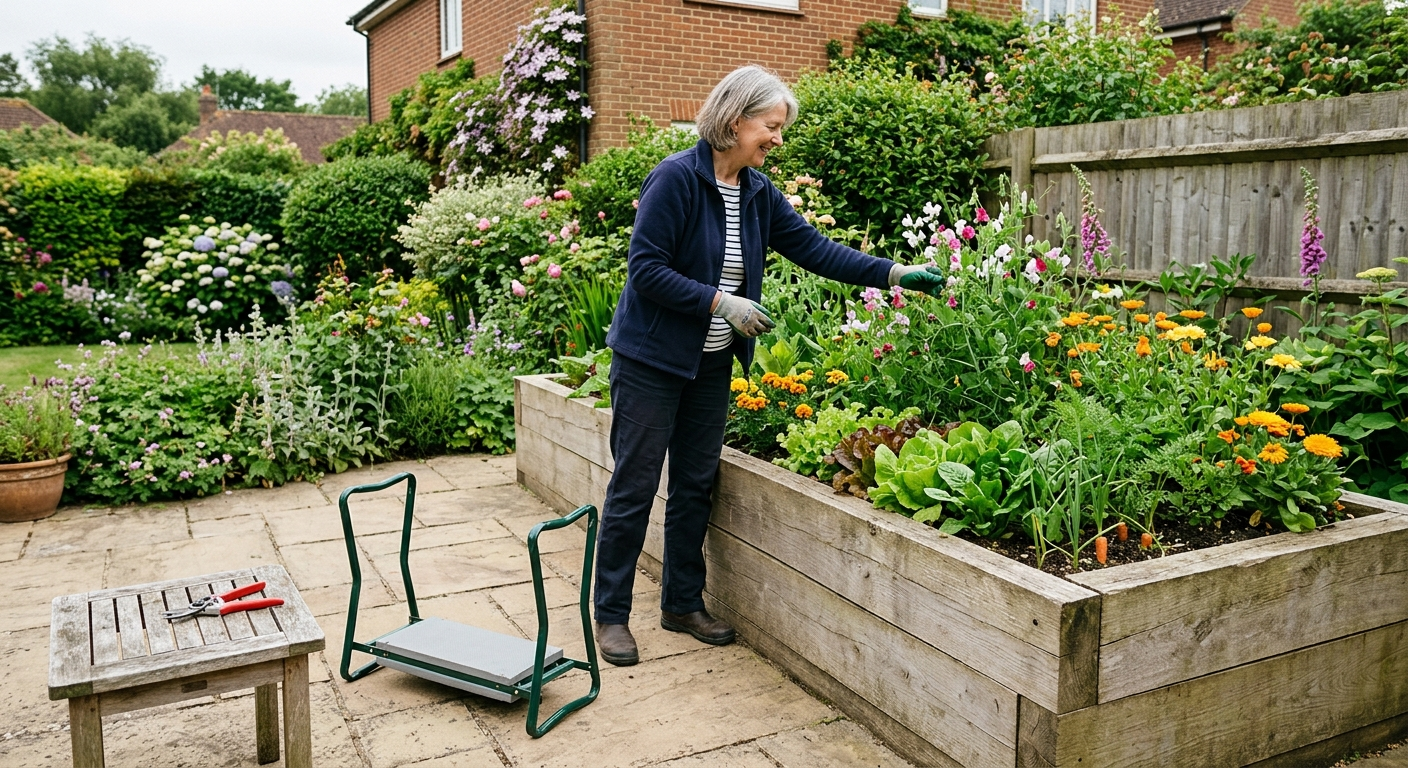
- Raised beds at waist height – Aim for the top of the bed to sit between 90 cm and 105 cm from the ground. That height lets you stand upright, plant, and weed without having to lean over while holding a pot in the other hand. A timber raised bed built to these dimensions starts at roughly £100, but a pre‑fabricated metal version runs about £150‑£200.
- Wide, flat pathways – A minimum width of 1 m lets you turn a wheelbarrow or a trolley without wobbling. Flat surfaces also make it easier to set a pot on a rolling stand and slide it into place.
- Stable seating – A garden kneeler with side handles or a low stool gives you a solid base. The handles let you push yourself up with the good arm, freeing the weaker side for the tool. Expect to pay around £40‑£70 for a decent model.
- Pot and container placement – Heavy pots belong on a sturdy bench or a rolling plant trolley rather than the ground. That avoids the classic “one hand holding the pot, the other digging” scenario.
Setup Wins checklist – If you can’t reach it, move it to you; if you have to bend, raise it; if you’re balancing on one leg, add a seat or kneeler.
A quick reality check: most of the effort in one‑handed gardening is spent on positioning, not cutting. When the garden is organised to bring the work to you, the tools become genuine helpers rather than obstacles.
2. The “Tool” Phase: Cutting and Pruning for One Hand
A good tool does the work for you, but only if its mechanism matches a single‑handed grip.
Ratchet and rotating-handle secateurs – the workhorse duo
The ratchet turns a hard squeeze into a series of light clicks. Each click releases a fraction of the cutting force, meaning you can slice a thick branch with three or four gentle squeezes instead of one brutal grip.
- Spear & Jackson Ratchet Secateurs – Roughly £10‑£20. The ratchet offers four clicks per cut, which is enough for most garden shrubs. The downside? The plastic housing can feel a bit flimsy on heavy-duty tasks, and the click can be a tad noisy on a quiet morning.
- Felco 7 – Around £65‑£90. Not a ratchet at all — its trick is a handle that rotates through the cut, so the blade follows the branch instead of twisting your wrist. Stainless steel blades and a low‑profile, non‑slip grip stay comfortable even when your hands are cold. The premium price is justified by durability; the only gripe I’ve heard from a handful of users is the slightly longer lever arm, which can feel bulky in tight spaces.
Cheap ratchet sets are prone to jamming after a few weeks of regular pruning: fewer, coarser stages and lower-grade internals give the mechanism far less tolerance for grit and wear before it seizes. If a ratchet still feels stiff even at the budget end, a rotating-handle design like the Felco above sidesteps the problem entirely — there’s no ratchet to jam, because the handle itself does the work of reducing twist.
Rotating handles and strap‑on grips
A rotating handle lets the blade follow the angle of the cut without twisting your wrist. Look for a 360° swivel joint – it reduces the need to re‑grip and keeps the hand in a neutral position.
Cheap foam or rubber sleeve grips slide over an existing handle and add a larger, textured surface – they’re inexpensive, roughly £5‑£12 per pair from most garden or mobility suppliers, and they make a standard pair of secateurs feel more purpose-built. If your grip won’t close reliably at all, specialist aids like those from UK-based Active Hands go further, strapping the whole hand to the tool rather than just padding the handle – at a higher price, but worth it for that level of need. Just be sure any strap is snug; a loose one can slip and cause a missed cut.
Digging and planting tools
A long‑handled trowel with an ergonomic, right-angled grip, such as the Peta Easi‑Grip Long Reach Trowel, costs around £25‑£30 – noticeably more than the standard 9‑inch Easi‑Grip trowel, but the extra length is the whole point here. It means you can rest the trowel on the ground and use your shoulder to drive it in, freeing the hand to simply guide the soil.
For heavier pots, a lightweight cordless garden trolley (around £70‑£120) with a low centre of gravity lets you roll a pot into place and use your hip to stabilise it while you open the lid with the good hand.
Now that you know what to look for, download the Free Easier Gardening Tool Checklist to compare these options side by side and spot any missing pieces in your kit.
3. The “Technique” Phase: Body Mechanics for One‑Handed Use
Before you ever tighten your grip, ask whether a bigger joint could do the job instead — your shoulders and hips can carry far more than your fingers can. Charities like Arthritis UK frequently highlight the importance of “joint protection”—which essentially means using your larger, stronger joints (like your shoulders and hips) to do the heavy lifting rather than straining the smaller joints in your hands and wrists.
Shoulder‑driven digging
Planting a seedling? Place the trowel blade on the soil, then lean your weight onto the shoulder of the good side and push down. The shoulder does the heavy‑lifting, while the hand simply guides the tool. In my experience a slight forward lean takes noticeably more of the load off the wrist than pushing straight down — enough that you’ll feel the difference within a few plants.
Hip‑stabilised pot handling
When you need to lift or adjust a pot, rest the side of the pot against your hip or thigh. Your hip acts as a brace, allowing the good arm to open a lid or pull out a plant. This trick is especially handy on a low stool where you can’t lean over the pot.
Body positioning – stand sideways
Facing a shrub head‑on forces you to twist the torso when you reach across. Turn sideways, with the good shoulder pointing towards the work. This orientation keeps the spine neutral and lets the good arm swing in a natural arc, reducing fatigue.
Rearranging the layout and practising the shoulder-push technique is often enough on its own to cut weekly weeding time noticeably and reduce how much you rely on a second hand to finish the job.
4. The “Maintenance” Phase: Keeping Your Tools Working
Skip a season of blade care and you’ll find yourself back to needing two hands for every cut. Dull blades or sticky ratchets force you to apply extra force – exactly what you’re trying to avoid.
- Cleaning – After each session, wipe the blades with a damp cloth and a splash of mild detergent. Remove sap and soil to keep the moving parts free.
- Sharpening – Use a fine whetstone or a metal file to hone the cutting edge. A sharp blade slices with a single click; a dull one needs several squeezes, completely negating the ratchet’s advantage.
- Lubrication – A few drops of light oil (WD‑40 specialist or a standard 3-in-One oil) in the ratchet housing keeps the clicks smooth. Over‑lubricating can attract dust, so wipe away any excess.
Regular upkeep means you won’t have to switch to a two‑handed tool because the one‑handed one has given up. You can find more on keeping your kit in working order across the blog.
Frequently Asked Questions
Can I use regular gardening tools with one hand?
Yes, but you will tire out much faster. Standard tools rely on two hands for leverage and bracing, so if you use them one-handed, you need to adapt your technique—like using your shoulder to drive a trowel—and add a stable seat to maintain your balance.
What is the best tool for one‑handed digging?
A long‑handled trowel with an ergonomic, right-angled grip, like the Peta Easi‑Grip Long Reach Trowel, is the best option. The handle keeps your wrist straight, and when you pair it with a shoulder‑driven push technique, you can dig shallow holes without relying on wrist strength.
How do I stop my tools from slipping?
Strap-on grips or gardening gloves with a textured nitrile palm are the most reliable ways to stop tools slipping from a single hand. Make sure the grip is snug and the tool’s handle is completely dry before you start cutting.
Is it worth buying expensive adaptive tools?
It genuinely depends on how often you garden and the strength of your working hand. Premium tools like the Felco 7 are built to last and the mechanism won’t jam under load, which is a real time-saver. If you only garden occasionally, a reliable budget option like the Spear & Jackson ratchet secateurs does the job perfectly well.
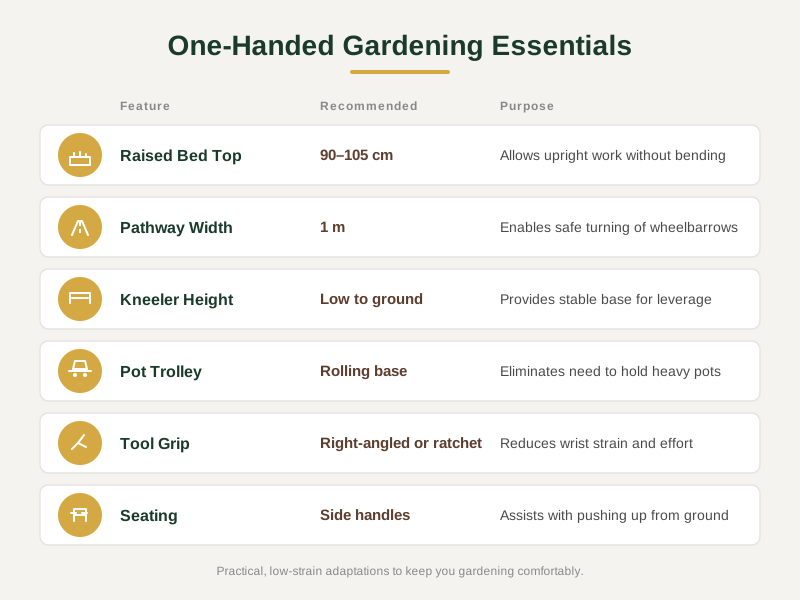
One-Handed Gardening Setup Reference
| Feature | Recommended Height/Width | Purpose |
|---|---|---|
| Raised Bed Top | 90–105 cm | Allows upright work without bending |
| Pathway Width | 1 m | Enables safe turning of wheelbarrows |
| Kneeler Height | Low to ground | Provides stable base for leverage |
| Pot Trolley | Rolling base | Eliminates need to hold heavy pots |
| Tool Grip | Right-angled or ratchet | Reduces wrist strain and effort |
| Seating | Side handles | Assists with pushing up from ground |
Let the Ratchet Do the Lifting
You’ve seen how a thoughtful garden layout, the right one‑handed tools, and a few body‑mechanic tricks can keep you planting, pruning, and digging without relying on a second hand. The key take‑away is simple: bring the garden to you, let the ratchet do the heavy lifting, and use your shoulder and hip as natural levers.
If you’re ready to sort your kit and avoid costly trial‑and‑error, download our Free Easier Gardening Tool Checklist – it’s a quick, printable guide that lists the essential tools, price ranges, and maintenance tips you need to get started.
If you want to know a bit more about the thinking behind this site, you can read the about page, or feel free to pop a question via the contact page. You’ve got this; the garden is still yours to enjoy.
Explore More Topics
Go deeper on specific topics:
- Gardening After Joint Replacement: Safe Tools and Expectations
- How to Adapt Existing Garden Tools for Better Grip
- UK Charities and Grants for Accessible Gardening Equipment
Who We Checked This Against
- Thrive - UK charity specialising in gardening for health and wellbeing.
- Arthritis UK - formerly Versus Arthritis; provides guidance on joint protection and physical activity.
- RHS - the Royal Horticultural Society’s own advice on gardening with a disability.
The measurements, prices, and mechanisms above are as accurate as we could verify at the time of writing, but tool fit and comfort are personal – if you’re working around a specific diagnosis or recent surgery, it’s worth running your final choices past an OT or the charities above before you buy.